Wednesday 4 September 2013

Rainbow sorbet


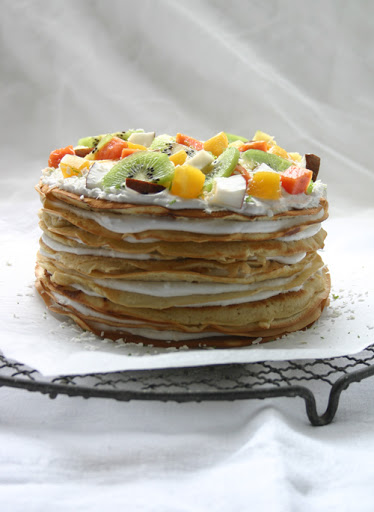
Long time no see! Been really busy here the last weeks and when the heat of summer hit us we spent more time in the park or in the garden than in front of our beloved computer. But I am catching up with some foodie posts and here is the first one. How about freezing a rainbow?
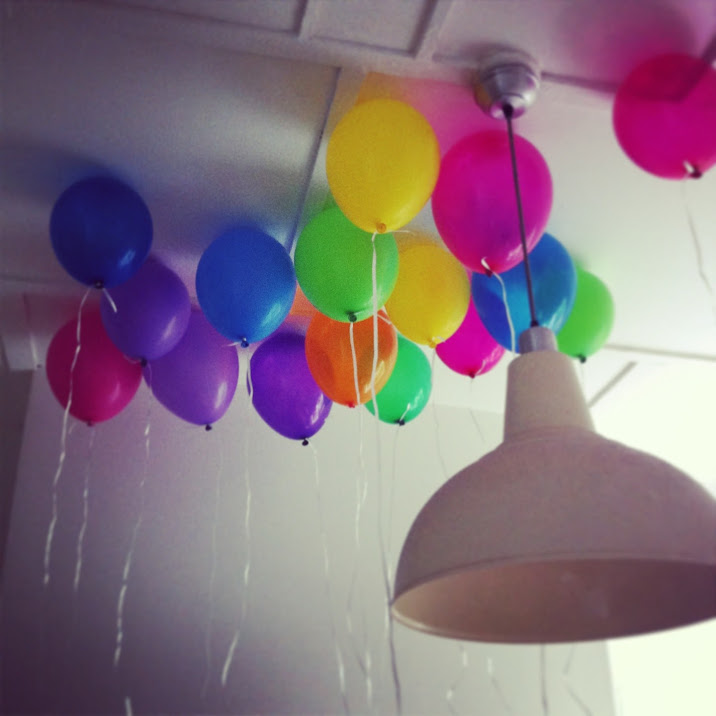
This dessert will definitely brighten everyones mood and it's great for a kids birthday party. Or do an adult version and add a hint of booze and make cocktail flavour layers. If life gives you lemons, crack open the gin! Just go easy on the alcohol as it will prevent the sorbet from freezing through and layering will be more difficult.
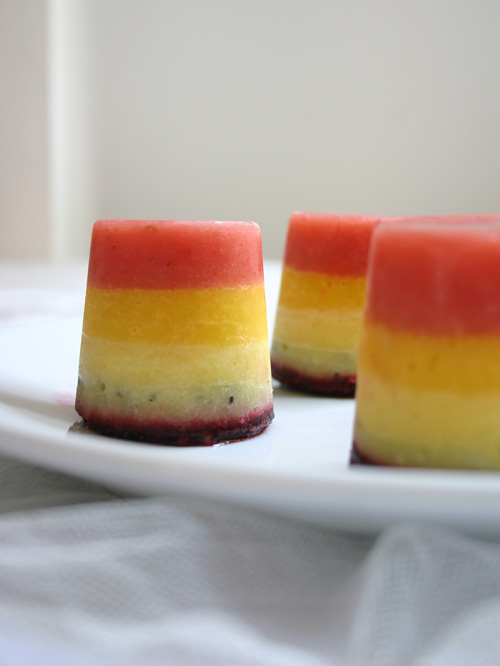
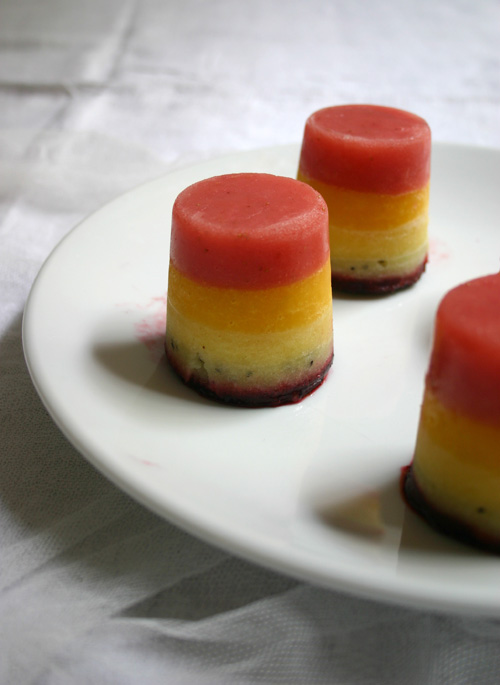
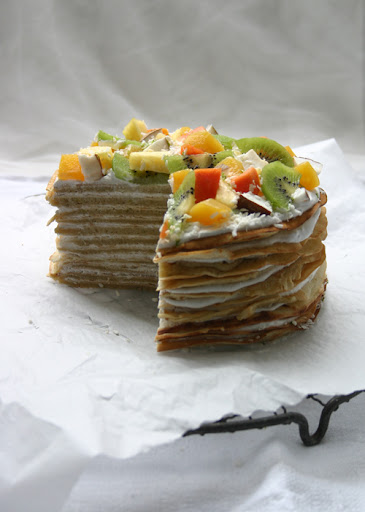
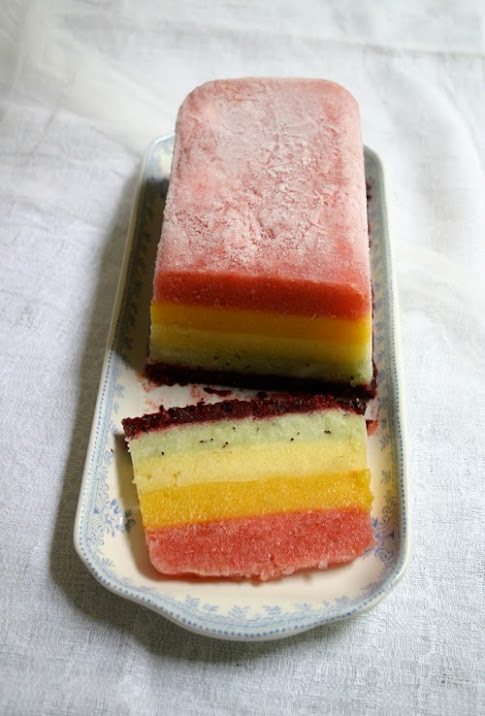
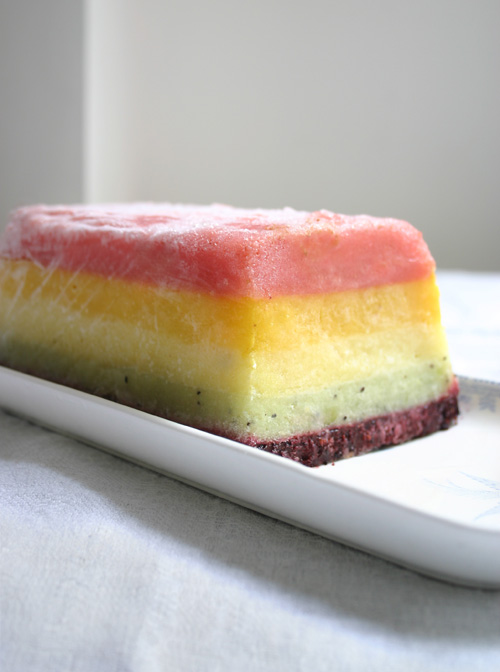
In the kid friendly version I made I have left out the sugar and just layered fruit purée. Still quite sweet if you make sure the fruit is ripe and juicy. Older kids may want it a bit sweeter so add caster sugar or agave syrup to taste. So the layers are as following:

strawberry and watermelon
mango
banana and pineapple
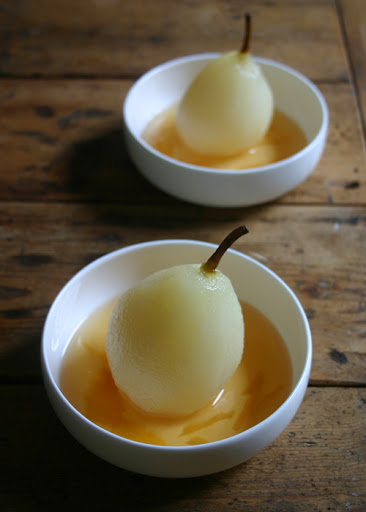
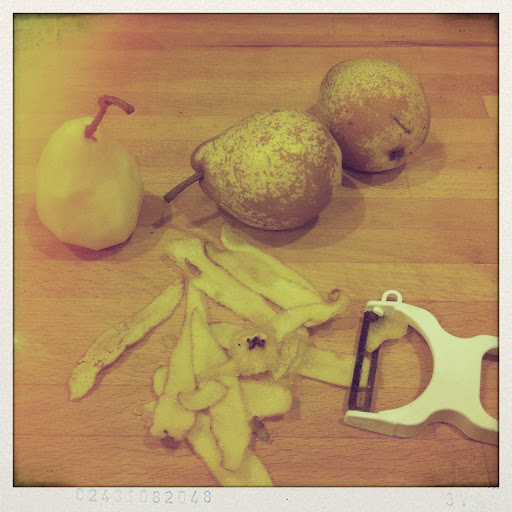
kiwi and pear
blackberry and vanilla


RAINBOW SORBET

Place your baking tin or other suitable dish, ideally metal, in the freezer for a few minutes. Blend the fruit with a blender or a food processor. Add the desired amount of sugar and/or spices and/or booze. Spread the first layer of fruit purée evenly in your chilled tin and put back in the freezer to chill and set. This may take several hours. Purée the next layer of fruit once the first layer is frozen solid and spread the next sorbet mix on top and so on. When you want to serve it it may take a while to defrost so you can cut it, there for make sure you take it out of the freezer some time before serving.


August


Full of colour: birthday balloons, rainbow cake and party animals.

Sunday 16 June 2013

Lemon curd cake


Summer is still keeping us waiting this year and the average temperatures last month have been at a record low. Now, that is not really something to celebrate and as I can't escape to a hot and tropical place to soak up the sunshine I have resorted to the second best thing to lift my spirits and that is baking. Lemons shout summer like nothing else and in German we have a saying: "Sauer macht lustig", what means something like sour makes funny. It doesn't translate that well but you should get the idea. Might be the funny faces we make when we eat something sour.
The base of the cake is a lemon sponge, filled with my tart homemade lemon curd and then decorated with a whipped cream and cream cheese icing. You will find a great tutorial about how to pipe the roses on this wonderful website here and there's lots more inspiration there, so go and pay Amanda's blog 'I am Baker' a visit. And now off to eating some more lemons. Summer, here I come!


LEMON CURD SPONGE CAKE

for the sponge
200ml vegetable oil
250g sugar
4 large eggs
400g flour
4 tsp baking powder
1 lemon (juice and zest)
pinch of salt

for the lemon curd
4 unwaxed lemons (juice and zest)
4 large eggs
350g caster sugar
250g butter

for the icing
200ml whipping cream or double cream
200g cream cheese
4 tbsp caster sugar
3 tbsp lemon curd
yellow food colouring

Preheat oven to 175-195°C. Mix the oil and sugar, add the eggs, salt, lemon juice and zest. Mix the baking powder and the flour and sift, gently adding to the mixture. Divide the mixture in half and pour into round baking tins. Bake for about 30 minutes and set aside to cool. In the meantime prepare the lemon curd. In a medium pan whisk the eggs and add the lemon juice and zest, sugar and small cubes of the butter. Gently bring to the boil over medium heat and continue to stir until the mixture thickens. Continue stirring and simmer for another minute and take of the heat. Pour into sterilised jars and leave some for the cake. Spread between the two layers of sponge and stack. To make the icing whip the double cream until it stiff. Add the sugar and cream cheese and blend. Cover the layered cake with a thin coating of the icing to seal and place in the fridge. Take about half of the rest of the mixture and fold in the lemon curd and food colouring. Spoon into a piping bag, alternating yellow and white icing. Place in the fridge for about 15 minutes as the yellow mix will be a bit runny still. With a large nozzle pipe roses all along the cake and place in the fridge before serving.


Saturday 1 June 2013

April


Trips to the garden center, Ottolenghi's cheese cake and my disco nails.

Monday 1 April 2013

March


Snow and ice, ice cream and icing sugar.

Sunday 31 March 2013

Happy Easter


Easter eggs and bunnies.

Friday 29 March 2013

Almond flake vanilla cake


So much time has passed and I didn't get to post but rest assured I haven't forgotten about you. Not that I haven't been making things (insert here anything from "cake" to "pasta") but the food that keeps me most busy these days takes on a funny shape. Rectangular to be precise. I have just been steaming some pear and turnip and it's now back in the freezer as ice cubes. Obviously not for a cocktail (though maybe the pear could work... still, alcohol is pretty rare in this house since a baby and a hangover don't mix very well...) but to make up the wee man's diet. How strange we start off like that. What have the Neanderthal man been doing before the invention of the blender? Well, they died out, didn't they...
And now for all the lovely people who have already developed their taste buds and are allowed refined sugar I have made a cake. Almond sponge and vanilla whipped cream with toasted almond flakes. Sort of to celebrate I am back on dairy. Now bring on the cheese!

ALMOND BUNDT CAKE

100ml vegetable oil
150g caster sugar
pinch of salt
2 small eggs
dash of vanilla extract
50ml almond milk
150g flour
1 tsp baking powder
100g ground almonds
100ml double cream
2-3 tbsp caster sugar
dash of vanilla extract
100g almond flakes

Preheat the oven to 180°C/Gas 4. With a hand held mixer whisk the oil, sugar and salt. Add the eggs and mix until pale in colour and well aerated. With a spatula fold in vanilla extract and almond milk. In another bowl sift the flour and baking powder and add the ground almonds. With the spatula gently incorporate the flour mixture, trying not to lose too much air. Grease the baking tin and dust lightly with flour. Fill the tin and bake for about 30-40 minutes. Leave to cool on a rack. Now whisk the double cream until its light and fluffy, add the sugar and the vanilla essence. Spread over the chilled cake and layer the toasted almond flakes to create a scale pattern.

Saturday 23 February 2013

February


London weather or the different shades of grey, waiting for spring and still time for some hearty food.

Wednesday 13 February 2013

Almond and rose water bundt cake


With Valentine's day coming up and in honor of Saint Valentine I have baked a cake. It's a simple almond bundt cake but the rose water icing makes it special. I have used a small cake tin but if you want to use a regular sized tin just double the measurements and bake for longer.

ALMOND AND ROSE WATER BUNDT CAKE

100ml vegetable oil
150g caster sugar
pinch of salt
2 eggs
dash of vanilla extract
50ml almond milk
150g flour
1 tsp baking powder
100g ground almonds
100g icing sugar
rose water

Preheat the oven to 180°C/Gas 4. With a hand held mixer whisk the oil, sugar and salt. Add the eggs and mix until pale in colour and well aerated. With a spatula fold in vanilla extract and almond milk. In another bowl sift the flour and baking powder and add the ground almonds. With the spatula gently incorporate the flour mixture, trying not to lose too much air. Grease the baking tin and dust lightly with flour. Fill the tin and bake for about 30-40 minutes. Leave to cool on a rack. Now mix the icing sugar and slowly add some rose water. Mix well so you won't have lumps and don't make the mixture too runny. Drizzle over the cake and wait for it to set before serving.


The rose is red, the violet's blue,
The honey's sweet, and so are you.


Tuesday 12 February 2013

Coconut pancake cake


Today is pancake day and I have made a cake. A pancake cake. Pancake Tuesday is the last day before Ash Wednesday when one would start the ritual fasting of the Lenten season, so last chance to live it up before going cold turkey. Well, no turkey.
Since I am off dairy for the time being I have used coconut cream instead of regular cream. You can whip it in the same fashion and it tastes brilliant. What a revelation! Just make sure you put your cans or cartons of coconut cream in the fridge overnight as it needs to be chilled so you can extract the solid cream from the liquid easily (if there is any liquid - it could be used in the batter instead of coconut milk). And it helps to freeze the bowl and the beaters for about 5 minutes before you get going.


COCONUT PANCAKE CAKE

2 cups flour
2 tsp baking powder
1/2 cup sugar
pinch of salt
1 cup coconut milk
1 cup almond milk
2 eggs
vegetable oil

For the filling
500ml coconut cream
3 tbs caster sugar
vanilla essence to taste
desiccated coconut
fresh fruit like mango, pineapple, kiwi, papaya

Mix all the dry ingredients in a bowl. Add all the wet ingredients and mix well to get an even batter. Brush a small pan with a little oil and cook the pancakes at medium heat about 2 minutes on each side. The batter should make about 12 pancakes. Leave them on greaseproof paper to cool down before assembling the cake. To make the filling whisk the chilled coconut cream at highest speed with a handheld mixer. Add the sugar and vanilla essence and whisk some more until soft and creamy. To assemble the cake spread some of the coconut cream over the first pancake, top with another pancake and keep alternating until all pancakes are used up. Top with some more coconut cream and sprinkle with desiccated coconut. Now peel, cut and arrange your fruit and you're ready to tuck in!

Thursday 7 February 2013

January


Snow like icing on a cake, to track and me turning into a snow man.

Sunday 3 February 2013

Leek tarte tatin


I love how a coincidence can make for a creative outcome. Did you know the tarte tatin was actually an accident and should have turned out like a perfectly normal apple tart? The story goes the elderly Stéphanie Tatin, who ran a hotel in France in the 1880s with her sister, got confused and put the pastry on the top of her apples rather than the bottom. An alternate story is that she was overworked and simply forgot the apples and sugar in the pan and when realising her mistake put the pastry on top and all quickly in the oven in order to rescue the dish. Either way it makes for a pretty tasty outcome.
My recipe involves baby leeks rather than apples but you could swap them for anything that is in season and takes your fancy, sweet or savoury. Just go easy on the salt and pepper. Or maybe not, could be a great new invention too and could turn our taste buds upside down.

LEEK TARTE TATIN

1 sheet puff pastry
150g baby leeks (6-8)
50g salted butter
2 tbsp sugar
pinch of nutmeg
twig of thyme or mixed herbs
cracked black pepper

Preheat the oven to 180°C/Gas 4. Wash the baby leeks and cut to 2-3cm long wheelsIn a small pan melt the butter and sugar until it starts to caramelise. Add the nutmeg and herbs and arrange the leek wheels in the pan and turn temperature down to medium so the leeks won't burn but start to cook. Cut out a circle slightly larger than your pan and place on top of the leeks. Tuck under and pierce a hole in the center so steam can escape. Bake in the oven for 15-20min or until the pastry is golden brown in colour. Flip over onto a plate but be careful with the hot pan.

Sunday 6 January 2013

Poached pears


Poaching fruit and storing in syrup is such an old-fashioned way of preserving for the colder month when fresh fruit is hard to come by. My grandma was a master in this fine art and had a cellar full of jam jar treasures. Cherries, apples, plums and of course pears from her garden on to our plate to complement pancakes or rice pudding or as a quick dessert in their own sweet juices.
This recipe is great for the firm winter pears you find these days as they will get soft throughout the cooking process but still keep their shape and won't get too mushy. You can keep the pears in the fridge for some days or freeze them in the syrup to use another day. You also don't need to strain the ginger and lemon peel as they will crystallise in the process and will taste great. The syrup would also be great with other desserts. Think panna cotta or brighten up humble yoghurt for breakfast.


POACHED PEARS WITH GINGER SYRUP

6 ripe but firm pears
3 cups dry white wine (Riesling is great)
1 cup sugar
pinch of salt
knob of ginger
1 lemon (peel and juice)

In a medium pot combine the wine, sugar, salt, lemon peel and juice and julienne of ginger. Simmer over medium heat until the sugar dissolves. Peel the pears and add to the liquid. Cover with a lid slightly ajar and simmer for about 15-30 minutes depending on the size of your pears. They are done when easily poked through with a knife. Transfer the pears to a plate and leave to cool. Meanwhile reduce the remaining liquid to a syrup. Boil for about 20 minutes. Serve the pears cold with warm syrup and maybe some ice cream or a dollop of crème Chantilly.


Friday 4 January 2013

Happy New Year!


2013 – sorry, but the bar has been set pretty high. Thank you 2012 for the arrival of Milo and the chaos and love he embodies. 2012 also brought a new house and home and a new perspective on life. Wow. But my New Year's resolution is to give 2013 a fair chance and I will keep looking at the sweet side of life and hope to spend more time here, trying out recipes and posting about them. Happy New Year to you all! {New Year, new luck}